My website (that you’re currently reading this on) is completely free. Well not completely free, I still have to pay for the domain name, but other than that there are no hosting fees, and it’s secure (https).
I thought I’d make a quick (and lazy) tutorial on how to get a freely hosted and secure website. This post is going to be a stub, and I’m assuming you already have a blog hosted on Github pages as a starting point. If you don’t already, there are a few good tutorials to get a Github pages blog up a running. Github kindly hosts these static pages. Here are a few tutorials to get started with Github pages and Jekyll blogs:
With your live Github pages jekyll blog in hand, let’s connect that to your personal domain with https. I’ll run through the following with my own website.
In order to have a website that is hosted for free (by Github), but is still secured (by Cloudflare), we’re going to have to redirect traffic. This starts with your domain provider (I’m using gandi.net). The web traffic will be redirected as follows, starting with someone typing in your domain into their browser.
your_domain.com -> Your domain provider (gandi.net) -> Cloudflare (secure) -> Github (free hosting)
To make this happen, follow along:
Step 1: Buy a Domain
I bought danielraff.com through gandi.net. It cost $201.50 CAD for 10 years.
Step 2: Add your domain to your Github Pages repo
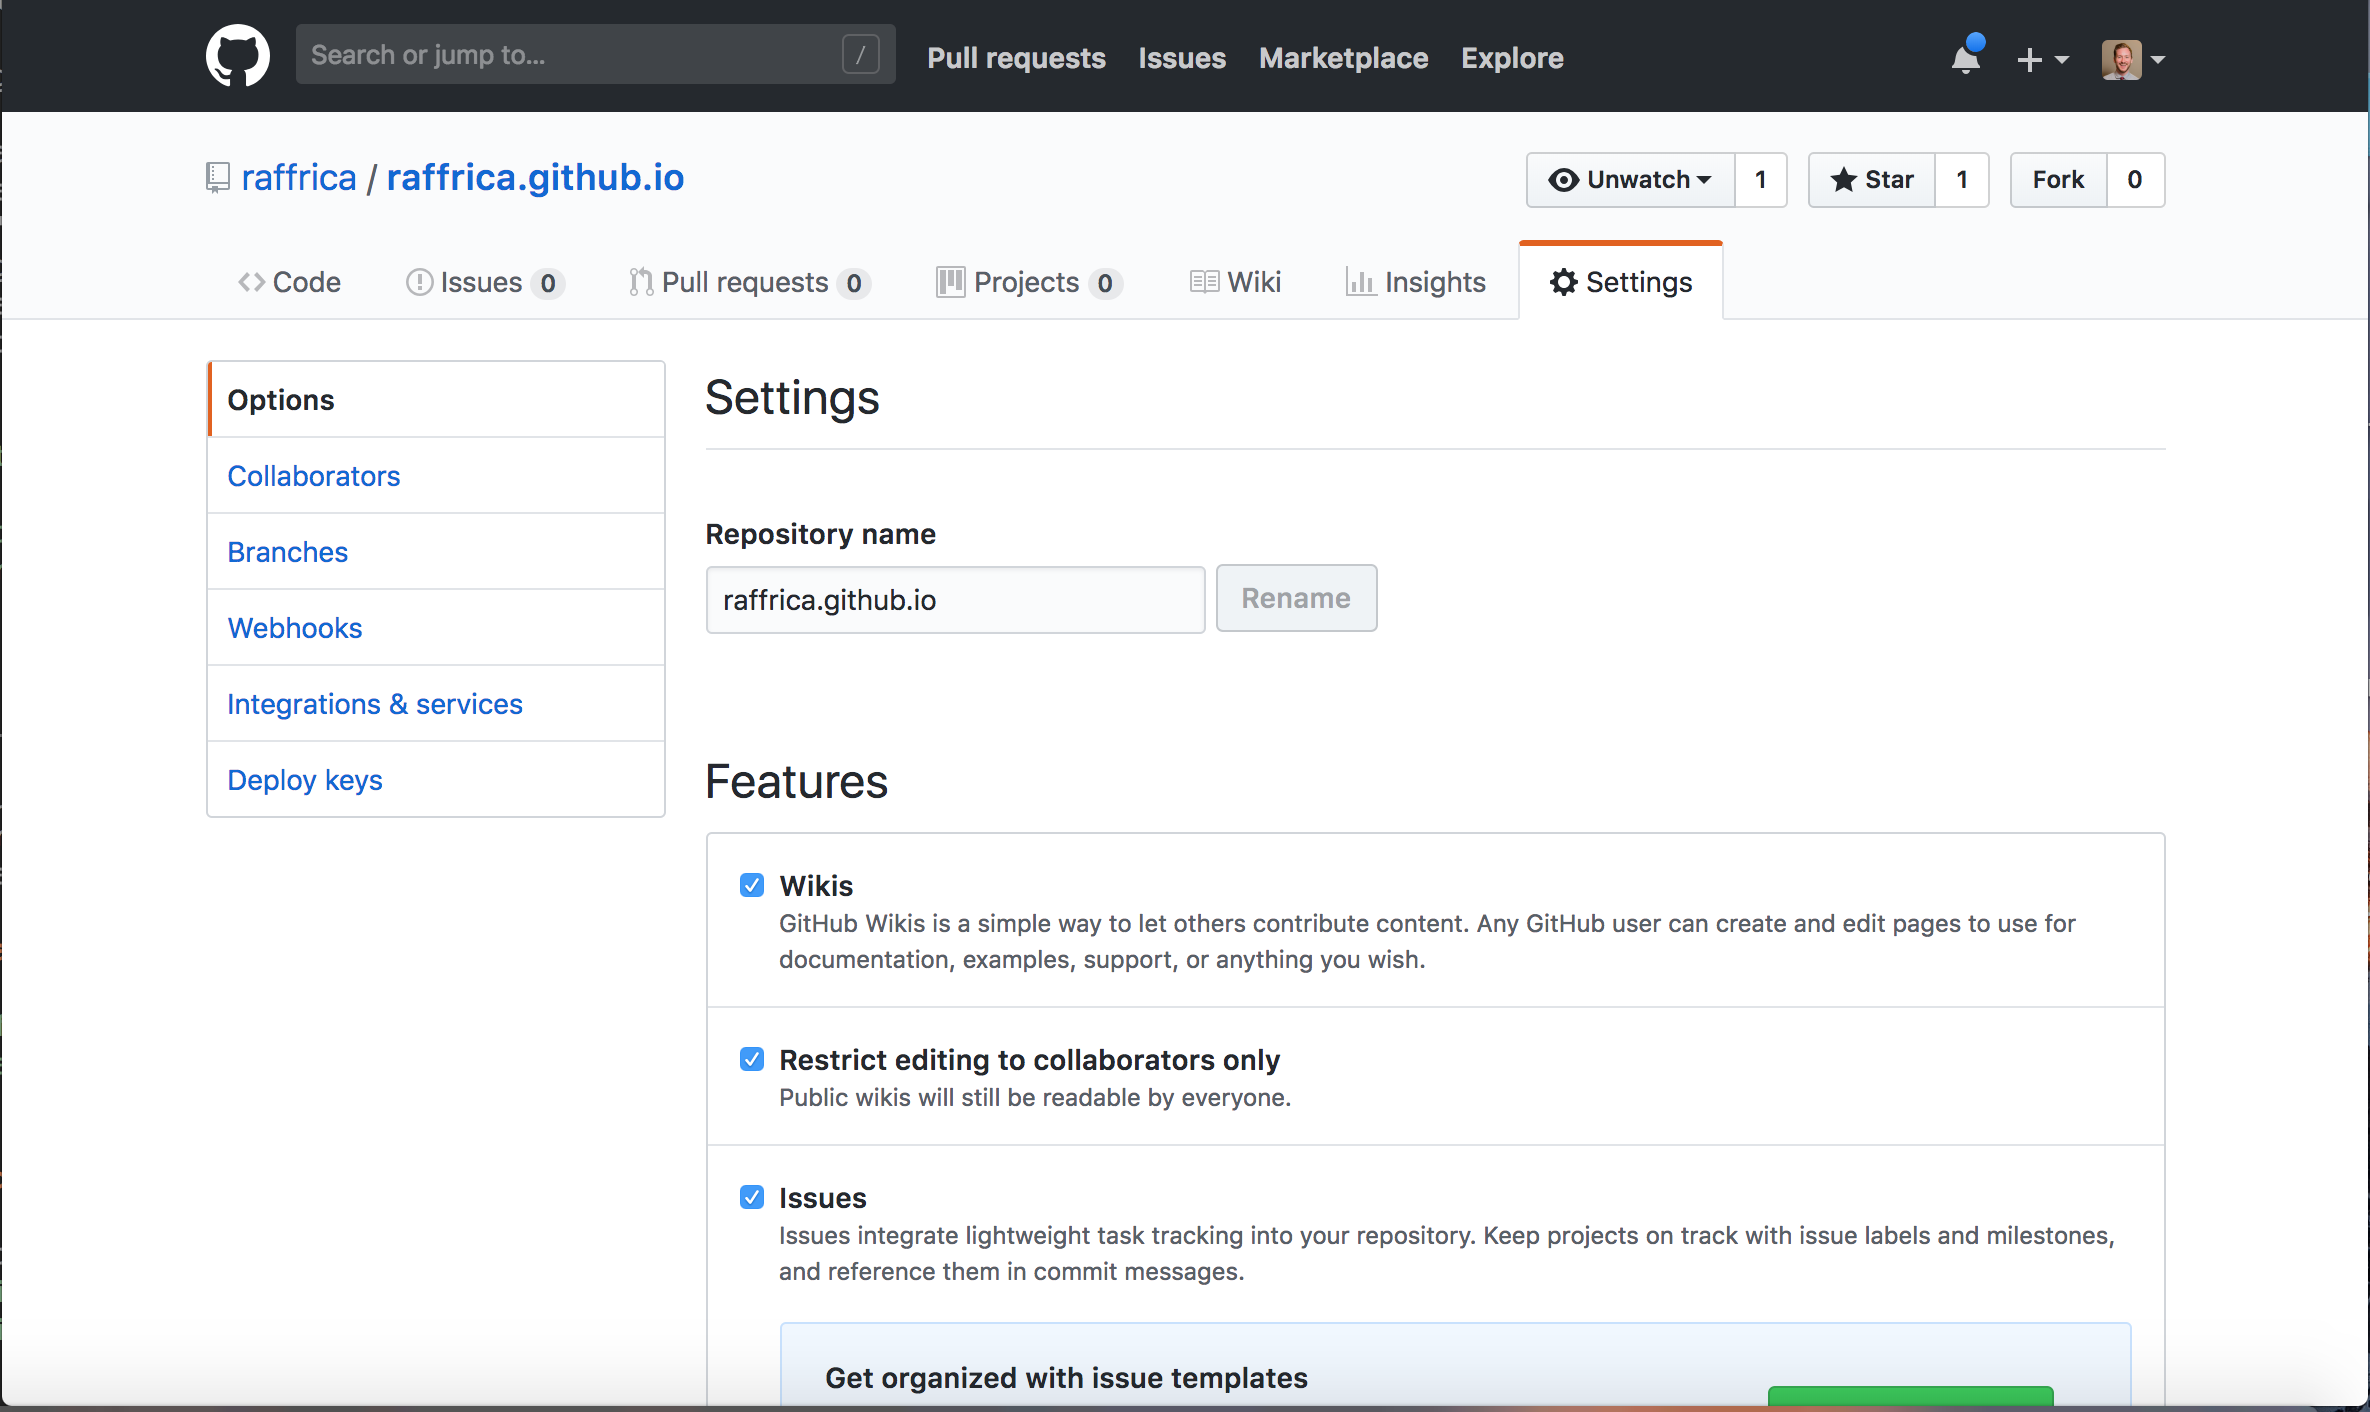
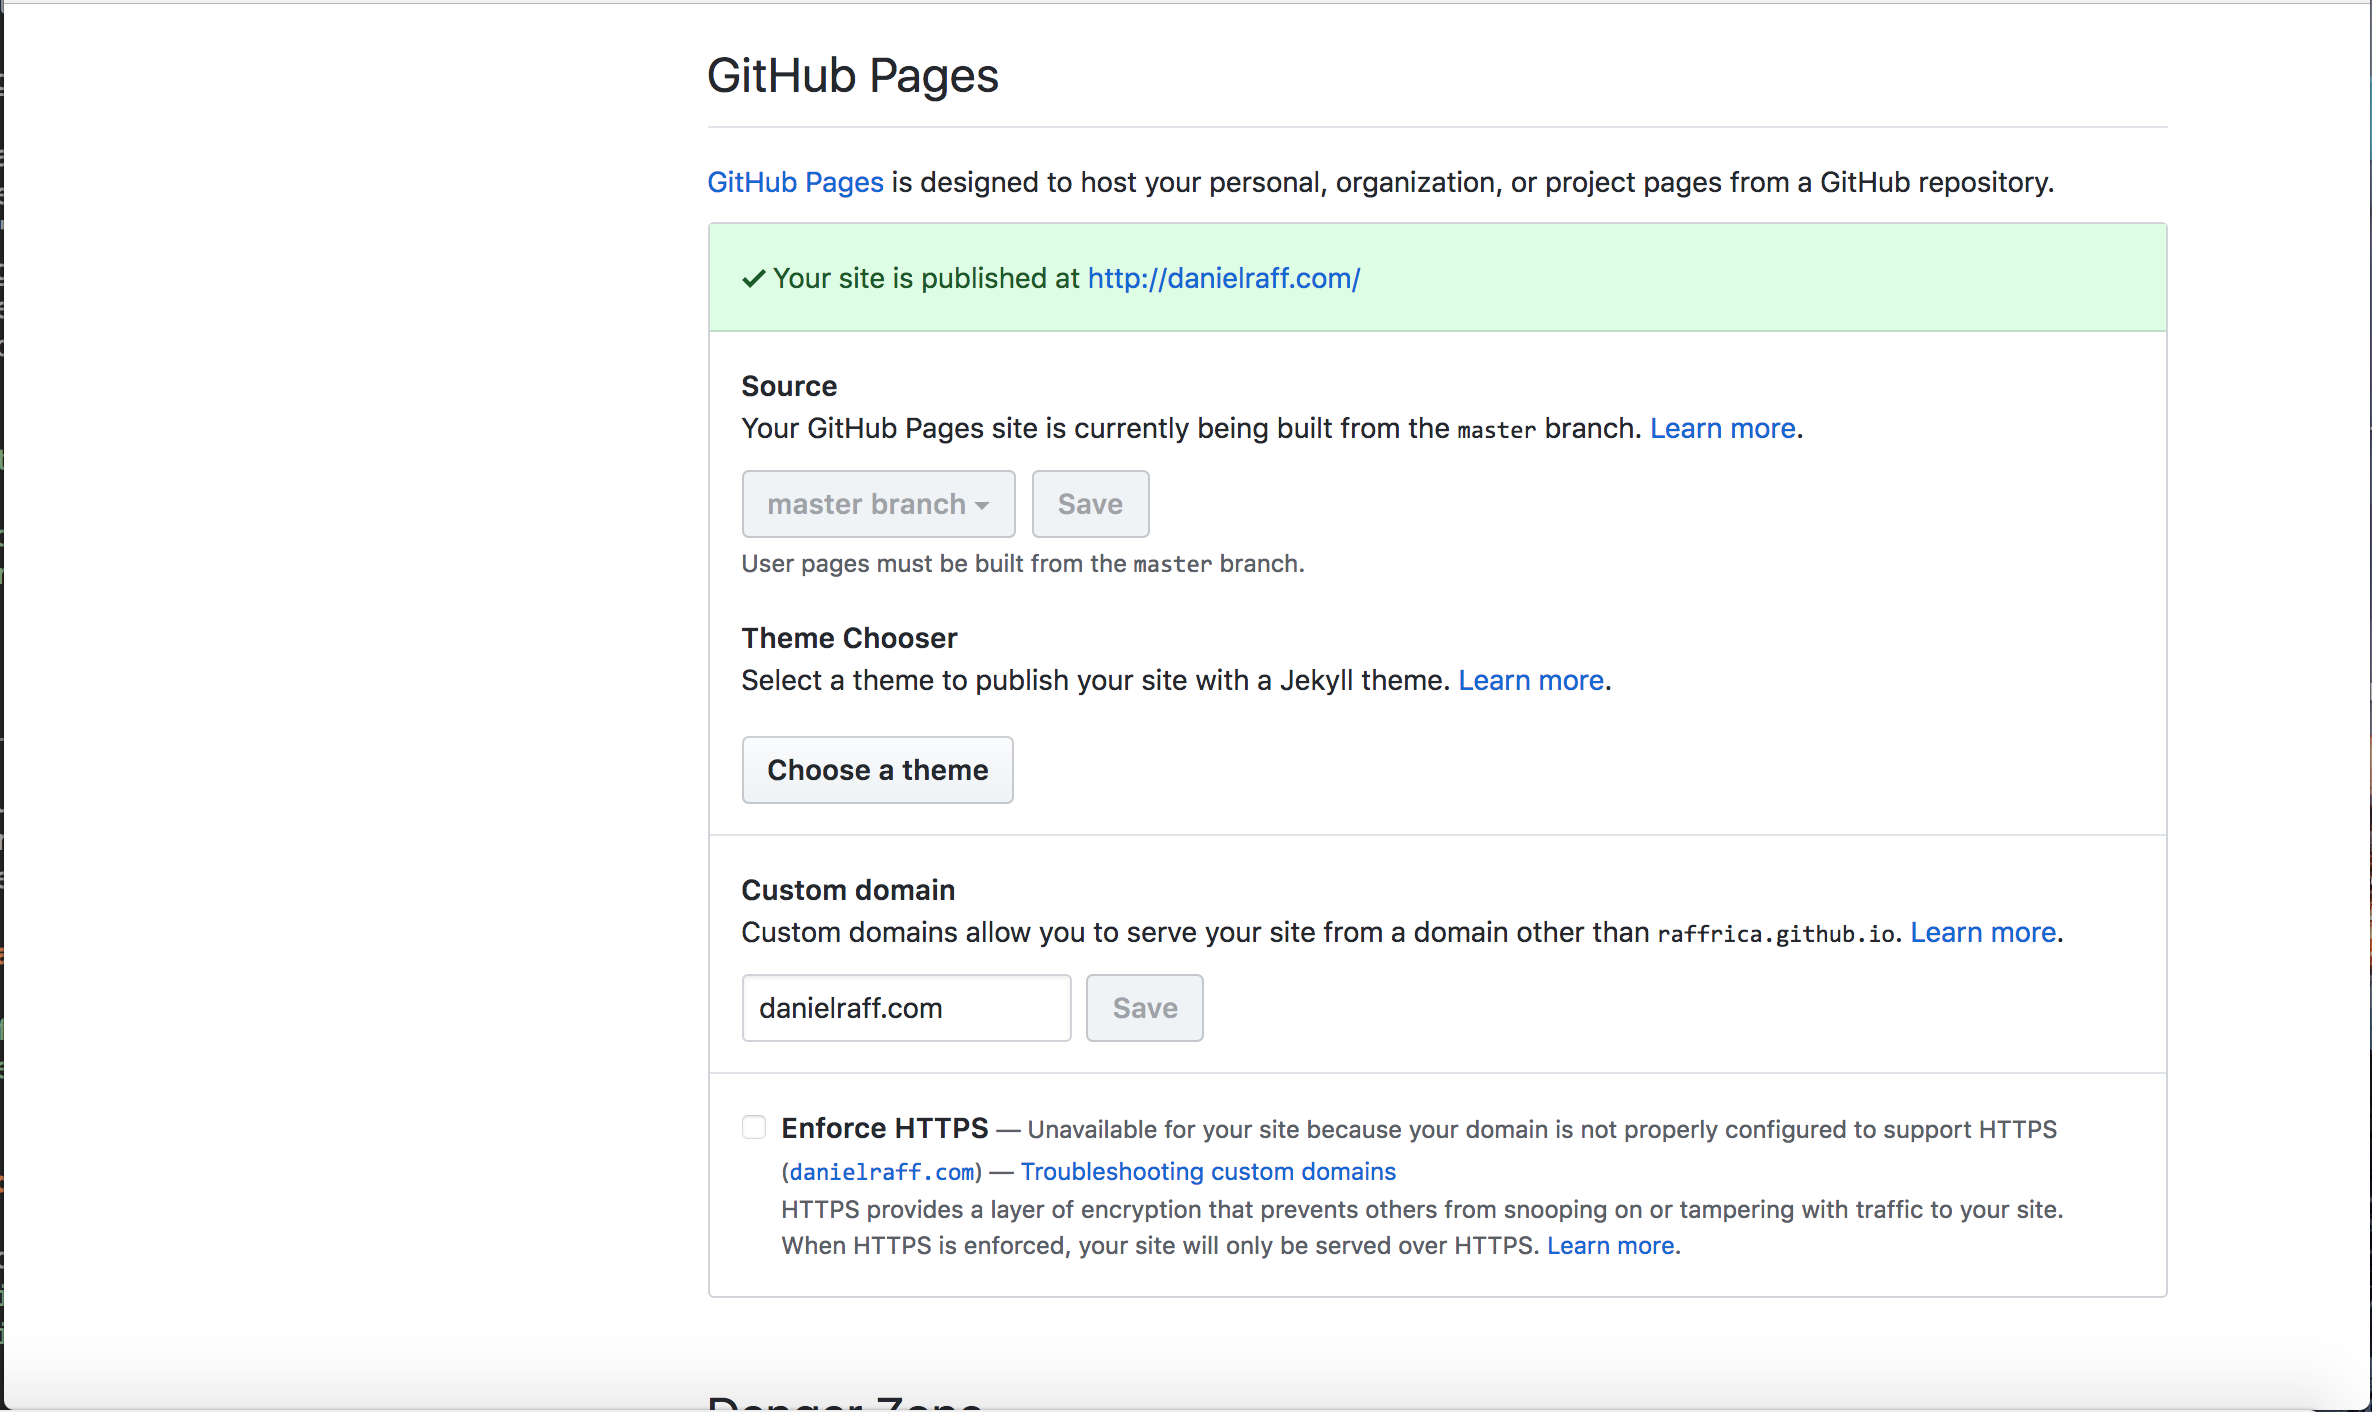
My github pages repo is at: https://github.com/raffrica/raffrica.github.io/. Navigate to the settings tab, and scroll down to the Github Pages section. Here, add your domain name to the Custom Domain section.
- Note: Alternatively you could just add a
CNAMEfile to the root of your repo with your domain name inside of it. Whatever floats your boat.
| Add your Domain to Github Pages |
|---|
 |
 |
Step 3: Make a Cloudflare account
Cloudflare has a free option for personal websites/blogs.
After you’ve made your account, add a site (your domain).
Modify your DNS records to match the following (except with you domain name instead of mine). Note: The IP addresses for Github pages are (192.30.252.153 and 192.30.252.154). Your equivalent to the IP address 217.70.184.38 will be whatever your domain name provider has supplied you with (Cloudflare should autopopulate this, but if it doesn’t log in to your domain name provider - in my case Gandi.net)
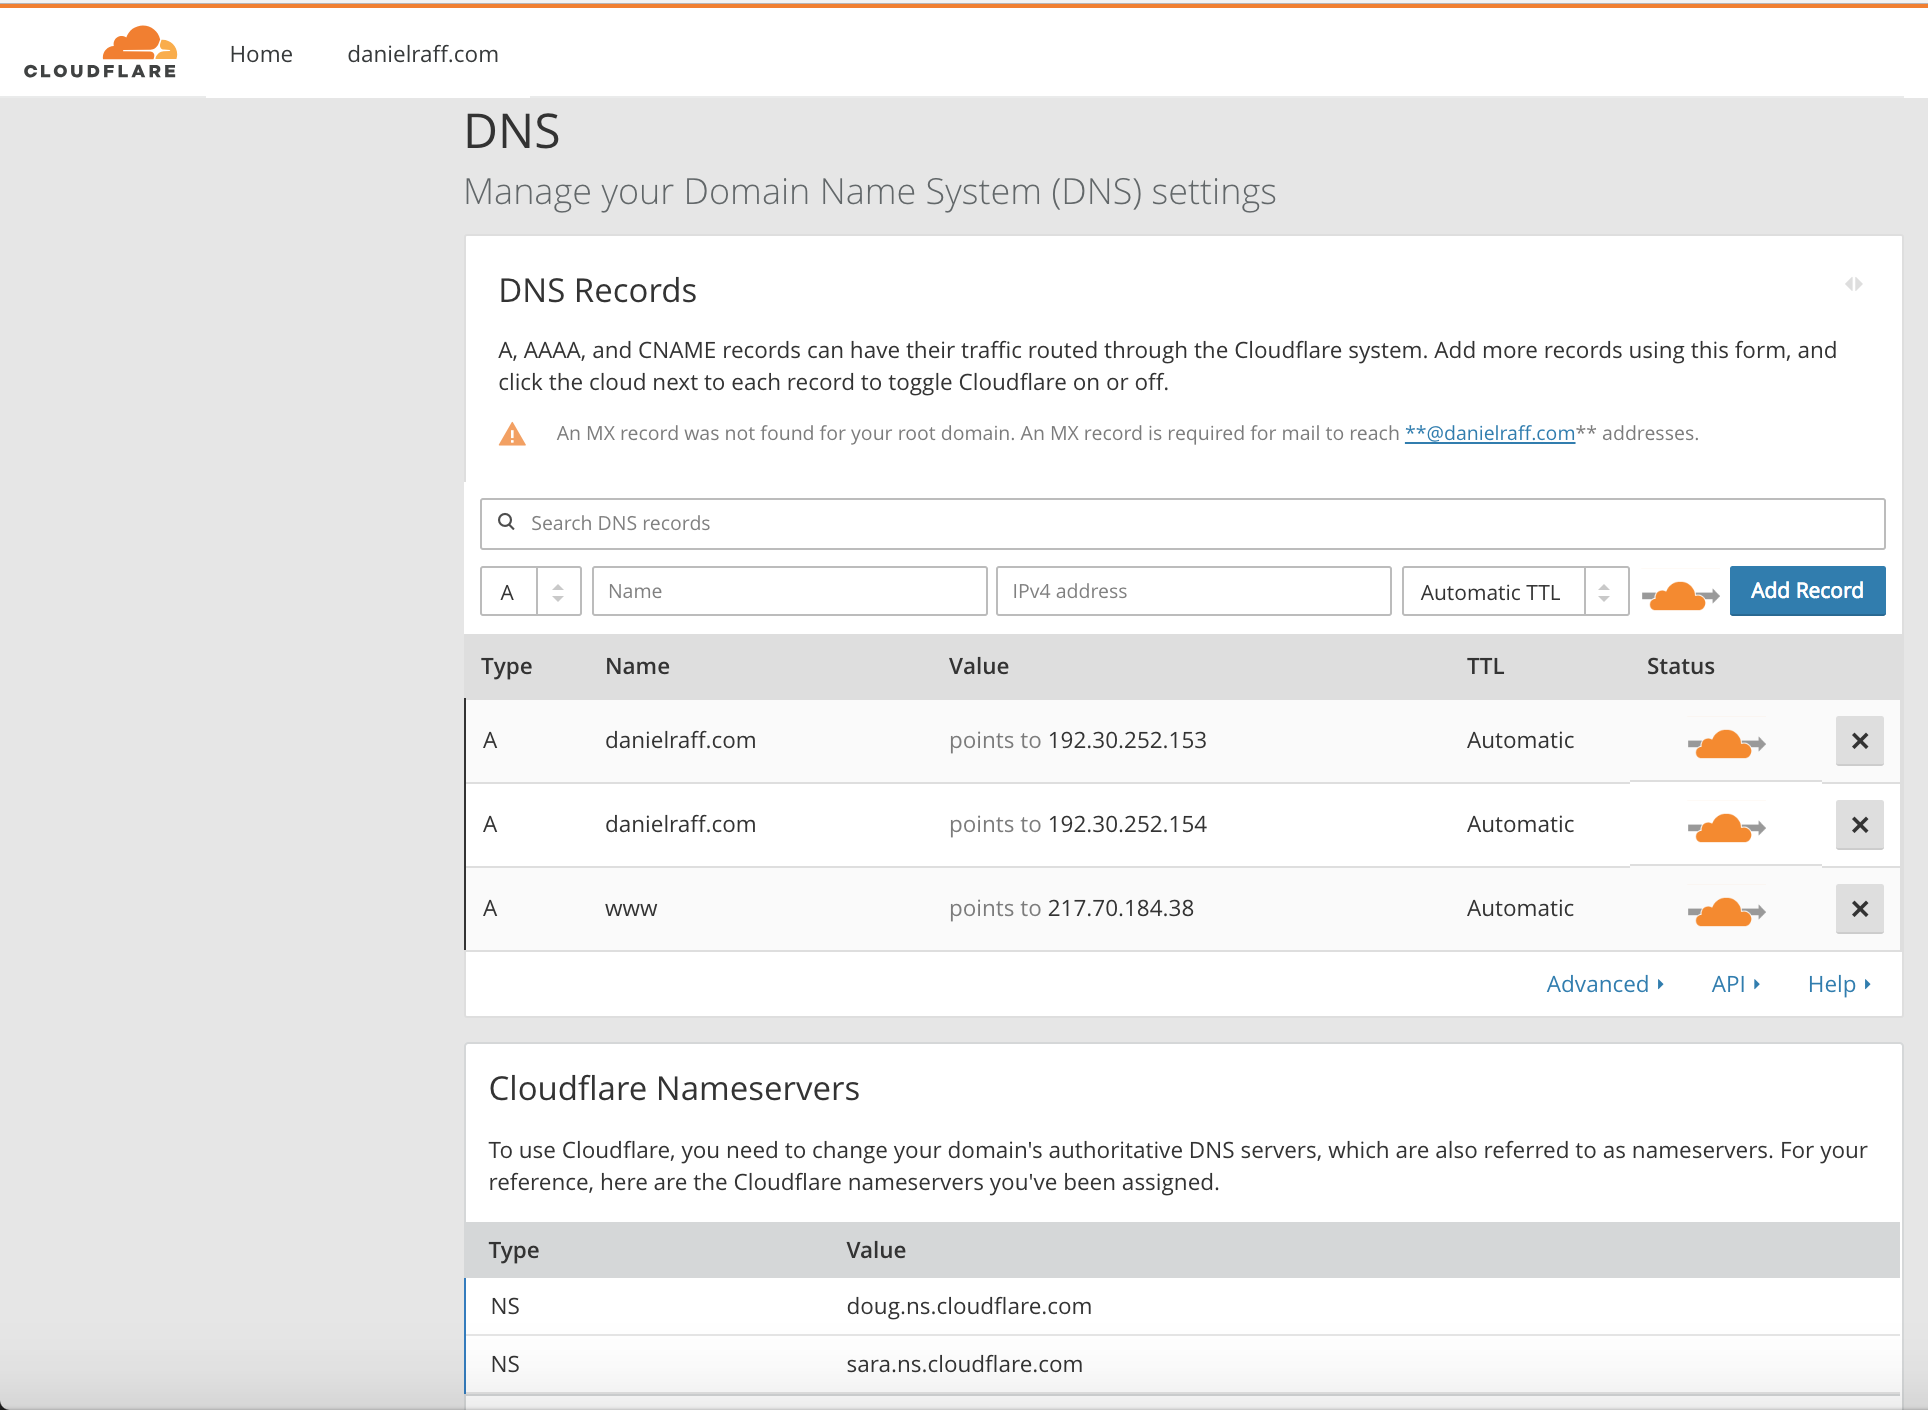
At the bottom of that image, you can see the Cloudflare nameservers that have been automatically generated. These are important. You’ll need these when we go and look at your domain name provider.
Now, importantly for SSL (and the ‘secure’ https to be enabled), we need to add a page rule to your site. Navigate to ‘Page Rules’, and replicate the following screenshot.
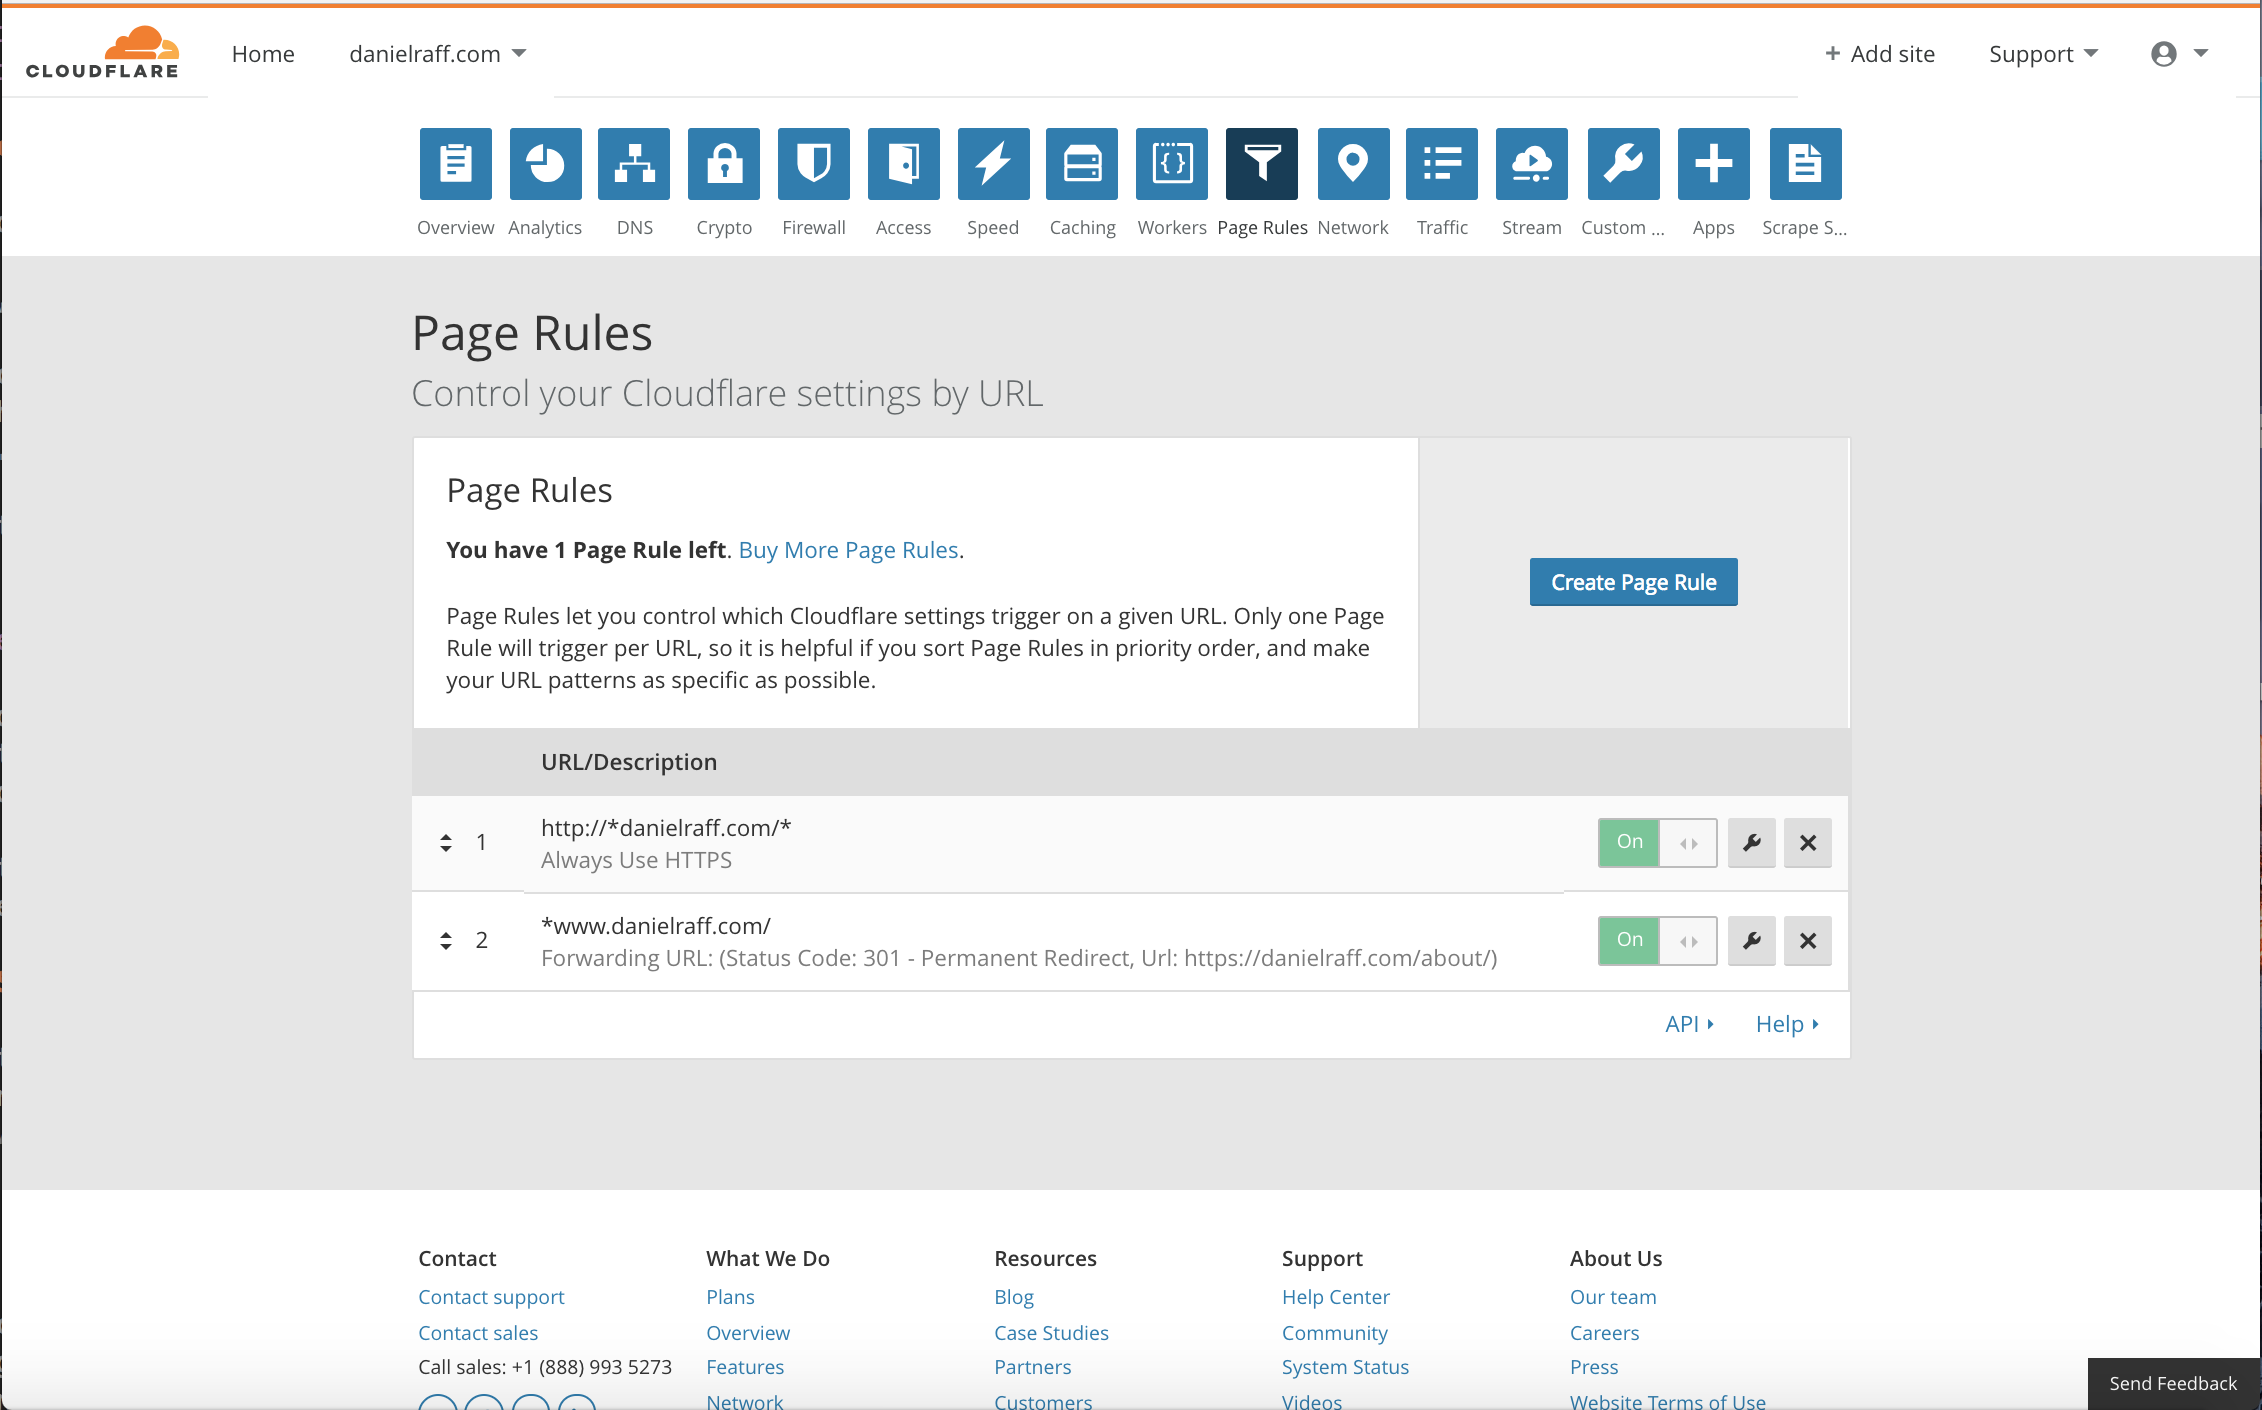
I added two rules here:
- I enforced always using
httpswith any derivation ofdanielraff.com. This asterisks are important here http://*danielraff.com/* ensure that all subdomains and pages within my website will load viahttpsand not justhttp. - (Optional) Cloudflare only allows a user to have a secure root domain for free, but I wanted it so that when someone enters
www.danielraff.com, I wanted it so that if people went towww.danielraff.comthere wasn’t an error page, so here I redirectwww.danielraff.comtodanielraff.com.
Step 4: Redirect from Domain name provider to Cloudflare
So far we’ve redirected traffic from Cloudflare to Github, and we’ve ensure that Github is expecting traffic from a specific domain name (CNAME). There’s still a missing piece however, the redirection of traffic from the domain name to Cloudflare in the first place.
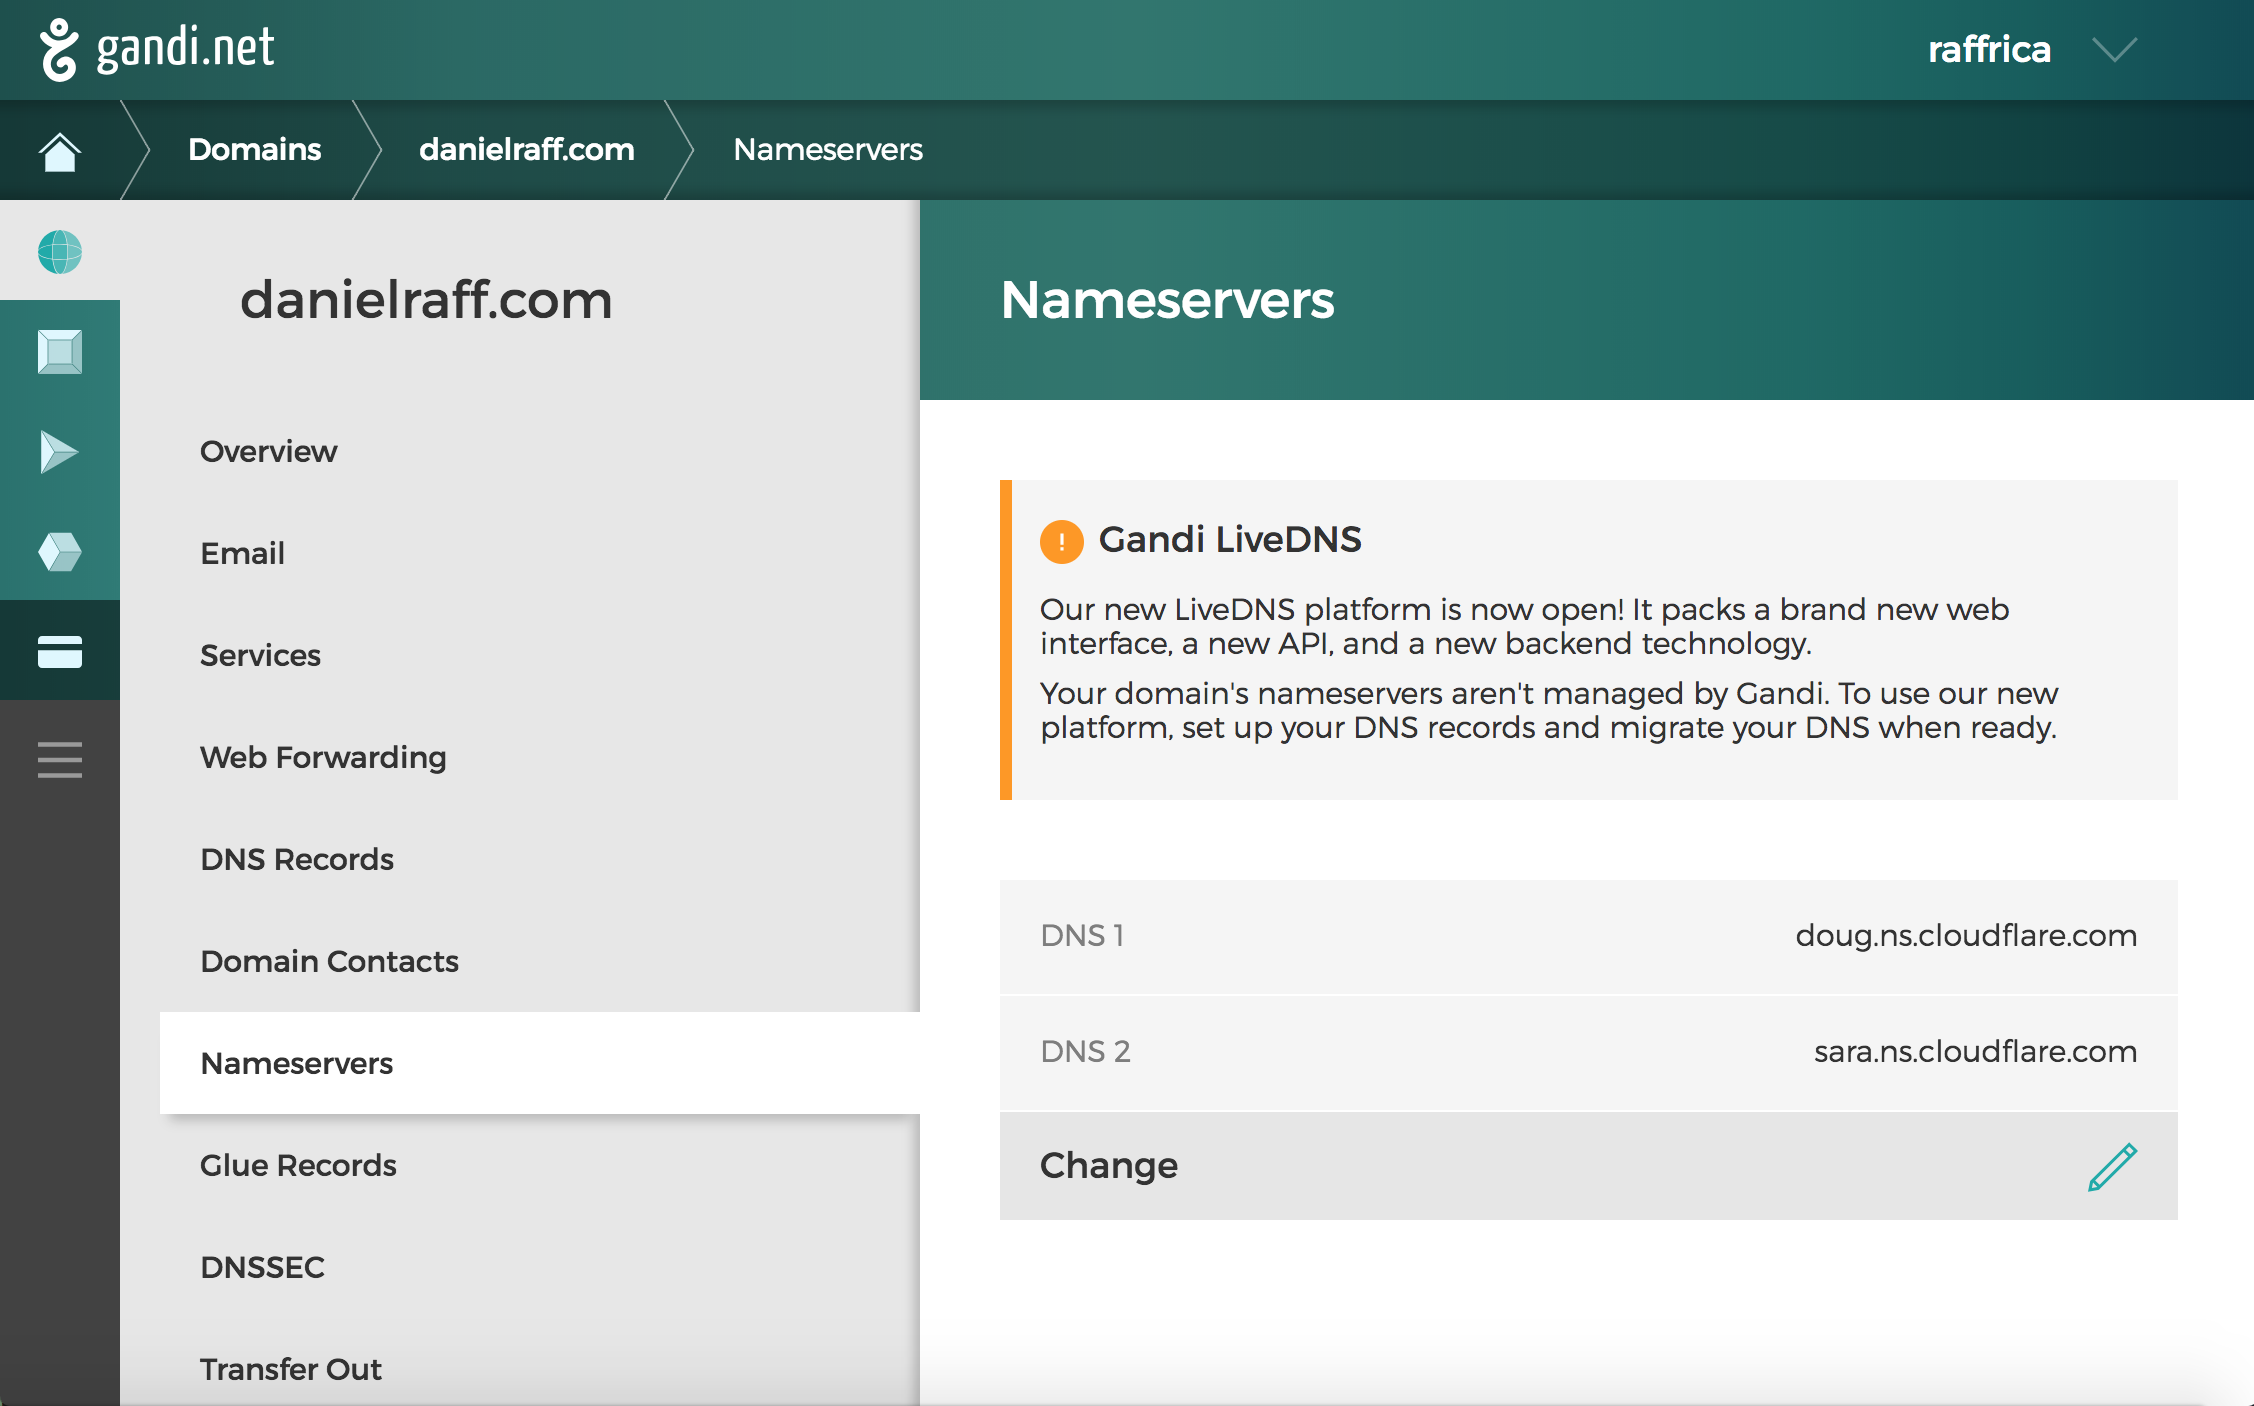
Change your domain name provider’s Nameservers to match the generated ones from Cloudflare. Check out the following screenshot for how I did that.
DONE!
Your website should now work.. although it may take a bit of time for Nameserver updates to be completed (up to 48 hours).
Please comment here if things aren’t working, or message me personally on Linkedin or through whichever channel you know me by.
Next Steps
You can read my blog post on what website addresses actually are.
You can add gmail ability (for free) following this tutorial: https://medium.com/@onedurr/how-to-set-up-custom-email-addresses-on-your-web-site-for-free-afd700de5e9c